A wizard is a sequence of dialog boxes to guide users. It's more convenient to perform complex UI tasks which has more conditional controls depends on user input. This article will show you to implement wizard with jQuery.
Features:
Our objective is to implement following features:
1. Create wizard easily from any structure. (In this article, we'll use ul li to implement wizard steps.)
2. Supports both back and forward navigation.
3. Supports client side validation
4. Allows to implement your own client side code on button click.
5. Allows to jump from any step to other step.
6. Generalize to use it on multiple pages.
To accomplish the above features, I created a generalize wizard script. Lets see how to use it.
Wizard Steps Structure:
Consider following structure to be converted into wizard.
<ul id="wizard">
<li>this is first step.</li>
<li>This is second step</li>
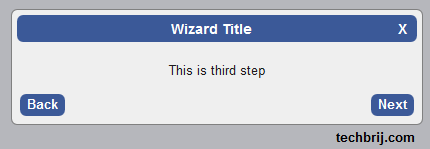
<li title="test">This is third step</li>
<li>This is fourth step</li>
<li>This is fifth step</li>
<li>This is sixth step</li>
<li>This is Final step</li>
</ul>
Settings:
We'll define following settings to implement wizard
var setting = {
                ctrls: $("#wizard li"), //Structure for Steps
                nextButtonTitle: 'Go',
                nextButtonCss: 'btnNext',
                callBack: btnNextClicked,
                previousButtonTitle: 'Back',
                previousButtonCss: 'btnBack',
                validateWizardStep: validateStep,
                validateWizardByTitle: validateByTitle,
                initStep: startStep
            };
showWizardScreen(setting);
You can download wizard.js, define settings and call showWizardScreen method to show wizard. that's it.
Let's go through setting options.
ctrls: define the elements for steps. Here li is going to be wizard steps, so $("#wizard li") is defined.
nextButtonTitle is text of Next button and nextButtonCss is CSS class of Next button.
callBack: You can define your method to be called on Next button clicked. It takes index of step as argument and returns index of next step. If you want to jump on particular step on next button click, return index of the new step. See following sample code:
var btnNextClicked = function (i) {
                switch (i) {
                    case 3:
					if (confirm('Do you want to jump on sixth step?')){
						return 5;
					}
					else{
						return 4;
					}
					break;
					case 6:
					alert('It is last step.');
					break;
					}
				};
previousButtonTitle is text of Back button and previousButtonCss is CSS class of Back button.
Validation: There are two ways to validate on wizard step. If you want to validate by index of wizard step then use validateWizardStep.
var validateStep = function (i) {
                switch (i) {
					case 1:  alert('This is validated by index'); return true; break;
                    default:
                        return true;
                        break;

                }
            };
Where i is index of wizard step starts with 0. If in particular step, data is not valid, make return false to keep on same step.
validateWizardByTitle: If you don't know index of wizard step OR most of steps are read only then you can define title of particular step and validate by title. in our example, third wizard step has title test.
 var validateByTitle = function (title) {
 switch (title) {
                    case 'test':  alert('This is validated by title'); return true; break;
			 default:
                        return true;
                        break;
						}
						};
initStep: Sometimes you need to start wizard from a particular step directly, in this case you have to define index of the step in initStep.
It is simple and easily customizable.
Hope, It helps.