Object: Most ASP.NET Applications implement roles to deal with role permissions and security. Sometimes, it is required to keep existing database structure to manage Roles. So, custom role provider is used for this. Here are the steps to implement navigation based on the custom role provider.
Step1:
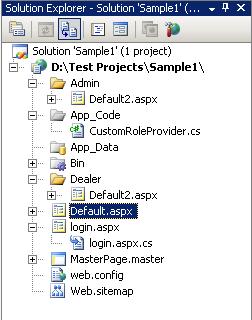
Right click on Project in solution explorer > Add New Item > Select Class and Give Name CustomRoleProvider.cs. Click OK for App_Code folder if it is not created.
Step2:
Inherit class with : RoleProvider. See following:

click on “Implement abstract class ..” option.
Now implement GetRolesForUser method.
public override string[] GetRolesForUser(string username)
   {
       string[] ret = null;
//        … Get Roles for a user logic here…
//   I  have implemented logic to get roles from database.

       return ret;

   }
Step 3:
Implement RoleManager and Authentication in web.config
<roleManager enabled="true" defaultProvider="CustomRoleProvider" cacheRolesInCookie="false">
       <providers>
         <clear/>
         <add applicationName="/" name="CustomRoleProvider" type="CustomRoleProvider" />
       </providers>
  </roleManager>

     <authentication mode="Forms">
       <forms defaultUrl="Default.aspx" loginUrl="~/login.aspx" slidingExpiration="true" timeout="20">
       </forms>
     </authentication>
     <authorization>
       <deny users="?" />
     </authorization>
In login page, On submit button click
if (. . . .username and password are okay. . . .)
       {
           FormsAuthentication.RedirectFromLoginPage(userName, false);
       }
Step 5:
Add web.sitemap in your app.
[xml]
<?xml version="1.0" encoding="utf-8" ?>
<siteMap xmlns="http://schemas.microsoft.com/AspNet/SiteMap-File-1.0" >
<siteMapNode url="" title="Home" description="" roles="*">
<siteMapNode url="~/Default.aspx" title="Main Default" description="" roles="*" />
<siteMapNode url="~/Admin/Default2.aspx" title="Admin Default" description="" roles="admin" />
<siteMapNode url="~/Dealer/Default2.aspx" title="Dealer Default" description="" roles="dealer" />
</siteMapNode>
</siteMap>
[/xml]
For securityTrimmingEnabled, add sitemap in web.config.
<siteMap defaultProvider="AspNetXmlSiteMapProvider" enabled="true">
     <providers>
       <clear />
       <add name="AspNetXmlSiteMapProvider"
    type="System.Web.XmlSiteMapProvider, System.Web, Version=2.0.3600.0, Culture=neutral, PublicKeyToken=b03f5f7f11d50a3a"
    siteMapFile="web.sitemap"
    securityTrimmingEnabled="true"  />
     </providers>
   </siteMap>
Step6:
In the sample, I used Admin folder for admin role and Dealer folder for dealer role.
So,Add location tag for this:
<location path ="Admin" >

   <system.web>

     <authorization>

       <allow roles ="admin"/>
       <deny users="*"/>
     </authorization>

   </system.web>

 </location>
 <location path ="Dealer" >

   <system.web>

     <authorization>

       <allow roles="dealer" />
       <deny users="*"/>
     </authorization>

   </system.web>

 </location>
Step7:
Add SiteMapDataSource and menu control in masterpage for navigation. Select SiteMapDataSource as a menu datasource.
<asp:SiteMapDataSource ID="SiteMapDataSource1" runat="server"
                   ShowStartingNode="False" />
       <asp:Menu ID="Menu1" runat="server" DataSourceID="SiteMapDataSource1">
       </asp:Menu>
Step8:
Run your app, you will see by default, in menu “Main Default” link appears. When you login with admin then you will get “Admin Default” option and “Dealer Default” for dealer login.
Enjoy this.