In this article, we will see different ways to export data to Excel from a web application. It is very common task for web developers. Here are different approaches to do it in ASP.NET - C#:
Approach 1:
Using the Excel PIA (primary interop assemblies) to generate a spreadsheet server-side.
It needs Microsoft Office suite installed on your server which is not good. So it is NOT recommended.
Approach 2:
Using CSV/TSV content and save it to a file with a .xls extension.
If you don't need control over formatting, styles, or workbook structure, only need data in excel, this approach is good for you.
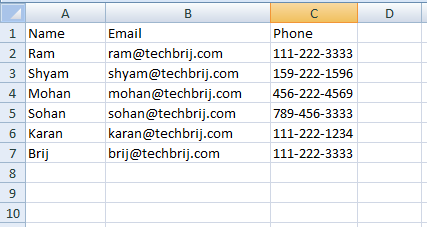
To convert Generic data to TSV (Tab Separated Values) Format, use following method:
  public void WriteTsv<T>(IEnumerable<T> data, TextWriter output)
        {
            PropertyDescriptorCollection props = TypeDescriptor.GetProperties(typeof(T));
            foreach (PropertyDescriptor prop in props)
            {
                output.Write(prop.DisplayName); // header
                output.Write("\t");
            }
            output.WriteLine();
            foreach (T item in data)
            {
                foreach (PropertyDescriptor prop in props)
                {
                    output.Write(prop.Converter.ConvertToString(
                         prop.GetValue(item)));
                    output.Write("\t");
                }
                output.WriteLine();
            }
        }
and use following ASP.NET MVC action to generate excel:
 public void ExportListFromTsv()
        {
            var data = new[]{
                                new{ Name="Ram", Email="[email protected]", Phone="111-222-3333" },
                                new{ Name="Shyam", Email="[email protected]", Phone="159-222-1596" },
                                new{ Name="Mohan", Email="[email protected]", Phone="456-222-4569" },
                                new{ Name="Sohan", Email="[email protected]", Phone="789-456-3333" },
                                new{ Name="Karan", Email="[email protected]", Phone="111-222-1234" },
                                new{ Name="Brij", Email="[email protected]", Phone="111-222-3333" }
                       };

			Response.ClearContent();
            Response.AddHeader("content-disposition", "attachment;filename=Contact.xls");
            Response.AddHeader("Content-Type", "application/vnd.ms-excel");
            WriteTsv(data, Response.Output);
            Response.End();
        }
For simplicity, I am using hard-coded sample data.
Read Also: Upload and Read Excel File (.xls, .xlsx) in ASP.NET MVC
Approach 3:
Generating HTML content and save it to a file with a .xls extension.
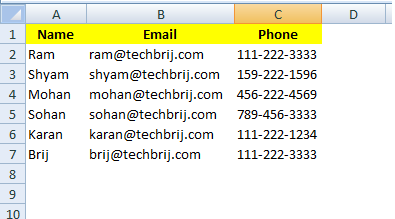
To convert Generic data to HTML Format with Table control, use following method:
        public void WriteHtmlTable<T>(IEnumerable<T> data, TextWriter output)
        {
            //Writes markup characters and text to an ASP.NET server control output stream. This class provides formatting capabilities that ASP.NET server controls use when rendering markup to clients.
            using (StringWriter sw = new StringWriter())
            {
                using (HtmlTextWriter htw = new HtmlTextWriter(sw))
                {

                    //  Create a form to contain the List
                    Table table = new Table();
                    TableRow row = new TableRow();
                    PropertyDescriptorCollection props = TypeDescriptor.GetProperties(typeof(T));
                    foreach (PropertyDescriptor prop in props)
                    {
                        TableHeaderCell hcell = new TableHeaderCell();
                        hcell.Text = prop.Name;
                        hcell.BackColor = System.Drawing.Color.Yellow;
                        row.Cells.Add(hcell);
                    }

                    table.Rows.Add(row);

                    //  add each of the data item to the table
                    foreach (T item in data)
                    {
                        row = new TableRow();
                        foreach (PropertyDescriptor prop in props)
                        {
                            TableCell cell = new TableCell();
                            cell.Text = prop.Converter.ConvertToString(prop.GetValue(item));
                            row.Cells.Add(cell);
                        }
                        table.Rows.Add(row);
                    }

                    //  render the table into the htmlwriter
                    table.RenderControl(htw);

                    //  render the htmlwriter into the response
                    output.Write(sw.ToString());
                }
            }

        }
In above method, we defined yellow header background color. use the above method to export data like below
 public void ExportListFromTable()
        {
            var data = new[]{
                                new{ Name="Ram", Email="[email protected]", Phone="111-222-3333" },
                                new{ Name="Shyam", Email="[email protected]", Phone="159-222-1596" },
                                new{ Name="Mohan", Email="[email protected]", Phone="456-222-4569" },
                                new{ Name="Sohan", Email="[email protected]", Phone="789-456-3333" },
                                new{ Name="Karan", Email="[email protected]", Phone="111-222-1234" },
                                new{ Name="Brij", Email="[email protected]", Phone="111-222-3333" }
                       };

            Response.ClearContent();
            Response.AddHeader("content-disposition", "attachment;filename=Contact.xls");
            Response.AddHeader("Content-Type", "application/vnd.ms-excel");
            WriteHtmlTable(data, Response.Output);
            Response.End();
        }
You can use ASP.NET GridView directly(instead of table).
        public void ExportListFromGridView()
        {

            var data = new[]{
                                new{ Name="Ram", Email="[email protected]", Phone="111-222-3333" },
                                new{ Name="Shyam", Email="[email protected]", Phone="159-222-1596" },
                                new{ Name="Mohan", Email="[email protected]", Phone="456-222-4569" },
                                new{ Name="Sohan", Email="[email protected]", Phone="789-456-3333" },
                                new{ Name="Karan", Email="[email protected]", Phone="111-222-1234" },
                                new{ Name="Brij", Email="[email protected]", Phone="111-222-3333" }
                       };


            Response.ClearContent();
            Response.AddHeader("content-disposition", "attachment;filename=Contact.xls");
            Response.AddHeader("Content-Type", "application/vnd.ms-excel");
            using (System.IO.StringWriter sw = new System.IO.StringWriter())
            {
                using (System.Web.UI.HtmlTextWriter htw = new System.Web.UI.HtmlTextWriter(sw))
                {
                    GridView grid = new GridView();
                    grid.DataSource = data;
                    grid.DataBind();
                    grid.RenderControl(htw);
                    Response.Write(sw.ToString());
                }
            }

            Response.End();
        }

If you want to export to excel from ASP.NET Razor View then use following action:
        public ActionResult ExportView()
        {
            Response.AddHeader("content-disposition", "attachment;filename=Report1.xls");
            Response.AddHeader("Content-Type", "application/vnd.ms-excel");
            return View(data);
        }
add a razor view of above action and use following code:
@model IEnumerable<ImportExcel.Models.Contact>
@{
    Layout = null;
}

<!DOCTYPE html>

<html>
<head>
    <meta name="viewport" content="width=device-width" />
    <title>ExportView</title>
</head>
<body>
    <div>
        <table>
            <tr>
                <th>
                    @Html.DisplayNameFor(model => model.Name)
                </th>
                <th>
                    @Html.DisplayNameFor(model => model.Email)
                </th>
             <th>
                    @Html.DisplayNameFor(model => model.Phone)
                </th>
           </tr>

            @foreach (var item in Model)
            {
                <tr>
                    <td>
                        @Html.DisplayFor(modelItem => item.Name)
                    </td>
                    <td>
                        @Html.DisplayFor(modelItem => item.Email)
                    </td>
                     <td>
                        @Html.DisplayFor(modelItem => item.Phone)
                    </td>
                </tr>
            }

        </table>
    </div>
</body>
</html>
In this approach, the logic is same to generate HTML, but the ways are different.
Approach 4:
When you open .xls file generated with Approach 2 & 3, you will get warning because of format difference. It is a bit annoyance.
EPPlus for .XLS
In this Approach, we will use free open source library EPPlus to export the content. It writes Excel 2007/2010 files using the Open Office Xml format (xlsx) only.
Run following command in the Package Manager Console to install EPPlus:
install-package epplus
Use following method for exporting data:
 public void ExportListUsingEPPlus()
        {
            var data = new[]{
                                new{ Name="Ram", Email="[email protected]", Phone="111-222-3333" },
                                new{ Name="Shyam", Email="[email protected]", Phone="159-222-1596" },
                                new{ Name="Mohan", Email="[email protected]", Phone="456-222-4569" },
                                new{ Name="Sohan", Email="[email protected]", Phone="789-456-3333" },
                                new{ Name="Karan", Email="[email protected]", Phone="111-222-1234" },
                                new{ Name="Brij", Email="[email protected]", Phone="111-222-3333" }
                       };

            ExcelPackage excel = new ExcelPackage();
            var workSheet = excel.Workbook.Worksheets.Add("Sheet1");
            workSheet.Cells[1, 1].LoadFromCollection(data, true);
            using (var memoryStream = new MemoryStream())
            {
                Response.ContentType = "application/vnd.openxmlformats-officedocument.spreadsheetml.sheet";
                Response.AddHeader("content-disposition", "attachment;  filename=Contact.xlsx");
                excel.SaveAs(memoryStream);
                memoryStream.WriteTo(Response.OutputStream);
                Response.Flush();
                Response.End();
            }
        }
You can see how easy it is in .xlsx format. This library allows you to set worksheet properties, custom and conditional formatting, Cell Ranges and Cell styling (Border, Color, Fill, Font, Number, Alignments),Formula calculation ..etc.
If you have datatable as datasource, use following to load it
workSheet.Cells[1, 1].LoadFromDataTable(myDataTable, true);
NPOI for .XLS & .XLSX
If you want to generate both .xls and .xlsx files from single library then use NPOI library. This project is the .NET version of POI from Apache Foundation. NPOI can read and write xls (Excel 97-2003), xlsx(Excel 2007+). To install NPOI, run the following command in the Package Manager Console:
Install-Package NPOI
Add following method:
  public void WriteExcelWithNPOI(DataTable dt, String extension)
        {

            IWorkbook workbook;

            if (extension == "xlsx") {
                workbook = new XSSFWorkbook();
            }
            else if (extension == "xls")
            {
                workbook = new HSSFWorkbook();
            }
            else {
                throw new Exception("This format is not supported");
            }

            ISheet sheet1 = workbook.CreateSheet("Sheet 1");

            //make a header row
            IRow row1 = sheet1.CreateRow(0);

            for (int j = 0; j < dt.Columns.Count; j++)
            {

                ICell cell = row1.CreateCell(j);
                String columnName = dt.Columns[j].ToString();
                cell.SetCellValue(columnName);
            }

            //loops through data
            for (int i = 0; i < dt.Rows.Count; i++)
            {
                IRow row = sheet1.CreateRow(i + 1);
                for (int j = 0; j < dt.Columns.Count; j++)
                {

                    ICell cell = row.CreateCell(j);
                    String columnName = dt.Columns[j].ToString();
                    cell.SetCellValue(dt.Rows[i][columnName].ToString());
                }
            }

            using (var exportData = new MemoryStream())
            {
                Response.Clear();
                workbook.Write(exportData);
                if (extension == "xlsx") //xlsx file format
                {
                    Response.ContentType = "application/vnd.openxmlformats-officedocument.spreadsheetml.sheet";
                    Response.AddHeader("Content-Disposition", string.Format("attachment;filename={0}", "ContactNPOI.xlsx"));
                    Response.BinaryWrite(exportData.ToArray());
                }
                else if (extension == "xls")  //xls file format
                {
                    Response.ContentType = "application/vnd.ms-excel";
                    Response.AddHeader("Content-Disposition", string.Format("attachment;filename={0}", "ContactNPOI.xls"));
                    Response.BinaryWrite(exportData.GetBuffer());
                }
                Response.End();
            }
        }
Note: In above method, It is clearly visible response syntax differences (ContentType, Header and Write) between xls and xlsx.
Consider following datatable as datasource:
			DataTable dt = new DataTable();

            dt.Columns.Add("UserId", typeof(Int32));
            dt.Columns.Add("Name", typeof(string));
            dt.Columns.Add("Email", typeof(string));
            dt.Columns.Add("Phone", typeof(string));

            dt.Rows.Add(1, "Ram", "[email protected]", "111-222-3333");
            dt.Rows.Add(2, "Shyam", "[email protected]", "159-222-1596");
            dt.Rows.Add(3, "Mohan", "[email protected]", "456-222-4569");
            dt.Rows.Add(4, "Sohan", "[email protected]", "789-456-3333");
            dt.Rows.Add(5, "Karan", "[email protected]", "111-222-1234");
            dt.Rows.Add(6, "Brij", "[email protected]", "111-222-3333");
To export in .xls format:
WriteExcelWithNPOI(dt, "xls");
To export in .xlsx format:
WriteExcelWithNPOI(dt, "xlsx");
Conclusion:
This post explains the different ways to export data in excel (.xls and .xlsx) format and their pros and cons. If you want your plain data in spreadsheet then approach 2 is good. If you are exporting data from any HTML element or you need some data formatting then approach 3 is good. If you need xlsx format then I recommend EPPlus. If you have to do a lot of operations on Excel and need support of both formats then NPOI is the best option for you, but it is very heavy.
Hope, It helps. Feel free to share your opinion in comment box.