In this tutorial, we will go through basic Git commands step by step and see how to use in the project. Also, we will put the code in the cloud using GitHub. It is assumed Git is already installed and configured on your machine. I am using Windows 10 for this post, but the same Git commands can be applied on Linux/Ubuntu.
Video:
The video covers from creating a Git repository to put it on remote server. Here are the used commands step by step:
1. To create a new local repository:
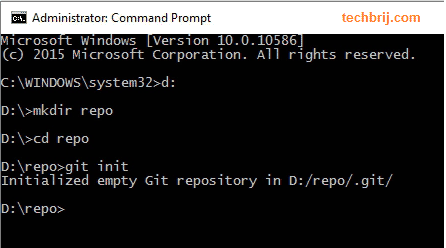
Let's create a directory for repository.
mkdir repo
cd repo
use following command to create repository
git init
It creates a .git directory that contains all the Git-related information for your project.
2. Create new file file1.txt and file2.txt in repo directory and run following command to check status.
git status

Status command displays a list the files you've changed and those you still need to add or commit.
3. Adding files:
Run following command to add both files:
git add file1.txt file2.txt
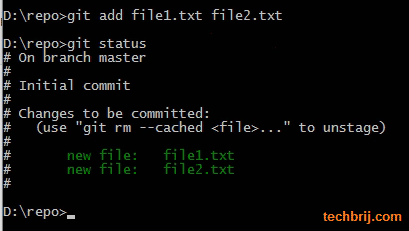
Add command adds one or more files to staging (index).
4. Commit:
After staging files, we can commit them into Git. Run following command to commit:
git commit -m "First commit"

-m for commit message.
you can use -a to commit any files you've added with git add, and also commit any files you've changed since then.
git commit -a
Note: it is dangerous. let’s say you opened a file and changed it by mistake. if you add -a to your commit, all files would be committed and you would fail to notice possible errors.
You can use both -a and -m as well
git commit -am "My commit message"
5. Further Commits:
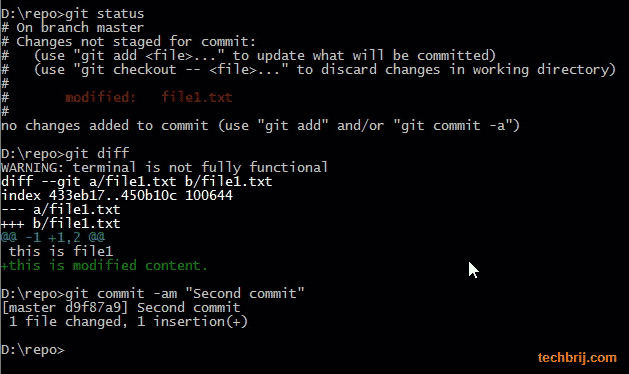
Let's modify file1.txt after first commit. Now to check the changes from the last commit, run following command:
git diff
If you want to have a look at the changes to a particular file, you can run git diff <file>.
Let's commit the changes
git commit -am "Second commit"
6. To show log:
To check the history of your project, run the following command:
git log
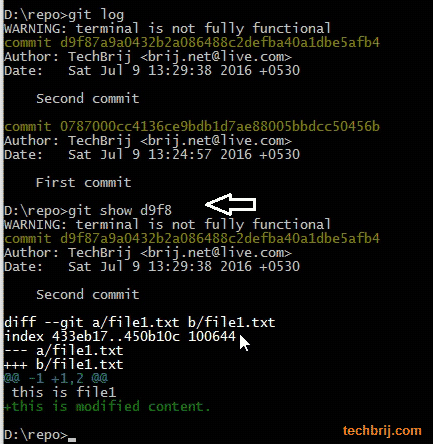
To view the details of a particular commit:
git show <hash>
Where <hash> is the hex number associated with the commit. you do not need to copy the whole string, and the first 5-6 characters are enough to identify your commit. As in the screenshot, only d9f8 is used.
7. To put code on remote server:
You could create a project on GitHub, GitLab, or BitBucket and push your existing code to the repository. Conveniently, a remote to which you have write access is called the origin.
Run following commands to add a remote origin and then push the code to the origin.
git remote add origin https://github.com/techbrij/gitsample.git
git push -u origin master
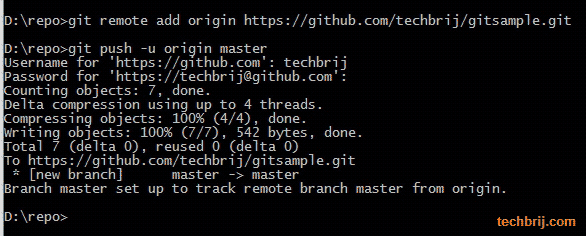
Push command is used to send changes to remote repository.
Hope it helps. In next part, we will go through branching and merging commands. Stay tuned and enjoy Git !!